
I switched over to using Scrivener for the vast majority of my writing more than five years ago, and I’ve been in love with it ever since. I find it an easy platform to work with, and I always seem to find a new feature to use.
One of my favourites is the corkboard feature. I’ve come to rely on it when outlining and revising my novel, and I thought other writers might find it useful, too, if they’re not already using it. So I’m dedicating today’s post to it.
Oh, and as a little disclaimer, I promise I’m in no way getting paid by Scrivener for this post; I just really like the feature, and wanted to share it with you.
The basics

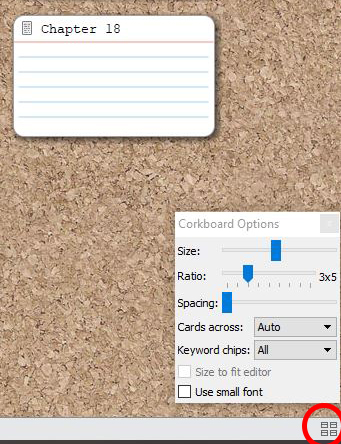
So, the corkboard feature. If you haven’t found it yet, getting there is fairly simple: Click on your draft folder, then the brown and white square at the top-centre of the screen (when you hover over it, a box will appear that says “View the group’s subdocuments on the corkboard”). If you have any documents created in the folder, they’ll appear as notecards on a corkboard.
Once in this view, you can change the settings by clicking the four little cards in the bottom right corner. This includes the size of the cards, number per row, and size of the font on the cards. If you want to rearrange them, click on the card you want to move and drag it to wherever it needs to be. Simple!
Getting the plot down
This is where the good stuff is. Essentially, you can use the notecards on the corkboard the same way you would physical notecards—you’re just saving paper.
For me, this means including the chapter title at the very top of the card, and then a date, year, or setting as a marker on the next line. After that, I answer two questions per card:
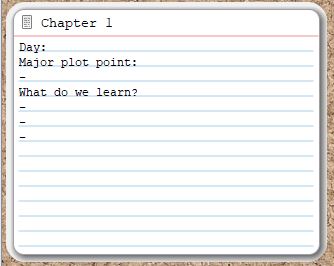
- What’s the major plot point?
- What big things do we learn?
One bullet goes under the major-plot-point question, then anywhere from two to five under the big-things-we-learn question. This helps me make sure every chapter is playing a role in the story, and isn’t just filling space. It helps me make sure the story is moving forward, rather than stagnating.
Outside of those two questions, any details I want to fill in get placed in the “document notes” section of the inspector panel. This isn’t really part of the corkboard feature, but I find it to be a good complement to it.
Some extras to keep in mind
The inspector panel really does work well as a complement to the corkboard feature. In particular, I like the Label option. I use this to colour code my notecards in both my outlining stage and revision stage, making a certain aspect stand out above others. When outlining, it’s useful for marking something like a point of view or timeline. When revising, it helps note whether I’d like to keep a chapter, delete it, merge it with something else, or create it from scratch.
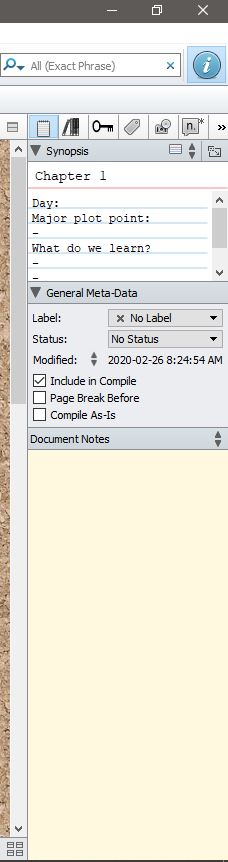
Additionally, the inspector panel has a little window at the top that displays the notecard version of the document you’re currently working on, regardless of which view you’re in. So if you have, say, chapter 12 open to be able to write it, you can still see the major plot point and bullets you want to learn about, without having to split your screen or go back to the corkboard.
Well, I think that’s about all I wanted to tell you about, corkboard-wise. I hope you found some useful little tidbits in there, and that maybe, just maybe, I’ve inspired you to start using the corkboard yourself.
Enjoy your writing!

Leave a comment